
How to Fix a Dripping Kitchen Tap: Step-by-Step Guide for Quick Repairs
How to Fix a Dripping Kitchen Tap: Step-by-Step Guide for Quick Repairs
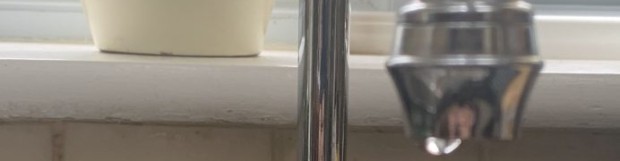
A dripping kitchen tap is not only annoying but can lead to wasted water and higher bills. Fortunately, fixing a leaking kitchen tap is often a simple DIY task that you can complete with a few basic tools. In this guide, we’ll explain the common causes of a leaking kitchen tap and provide step-by-step instructions to help you fix it.
Step 1: Turn Off the Water Supply to Your Dripping Kitchen Tap
Before you begin any repairs, make sure to turn off the water supply at the mains or the isolation valve under your sink. This prevents water from flowing while you work.
Step 2: Remove the Tap Handle for Accessing Internal Parts
To fix a dripping kitchen tap, you first need to remove the tap handle to access the valve or cartridge behind it. Here’s how:
-
-
Use a screwdriver to loosen and remove the handle.
-
Remove any decorative cap or screw to expose the internal components.
-
If you’re unsure how to remove your tap handle, check out our guide on how to remove the handle on your kitchen tap.
Step 3: Repair or Replace Internal Components of a Leaky Tap (Valves and Cartridges)
After removing the handle, you can access the internal parts. Depending on your tap type, you may need to replace the valve, cartridge, or ceramic disc.
-
For Compression Taps: Check the washers and O-rings. Replace them if they are worn out.
-
For Ceramic Disc Taps: Check the ceramic disc. If damaged, replace the ceramic disc valve.
- For Kitchen Taps with a Cartridge e.g Single lever Taps or Filter Taps: Check the cartridge.
The following guides will be of particular use here, How to replace a cartridge from a Single Lever Tap and 7 easy steps to replace a valve.
Step 4: Fix Leaks Coming from the Spout (O-Rings or Pinhole Repair)
If your kitchen tap leaks from the spout, it could be due to damaged O-rings or a pinhole in the spout.
A. Replacing Damaged O-Rings
-
Use a 2mm or 2.5mm Allen key to remove the spout.
-
Check the O-rings for cracks or signs of wear. Replace them with a new set.
B. Replacing the Spout for a Pinhole Leak
If you discover a pinhole in the spout, it’s best to replace the entire spout.
The following guides will be of particular use here, How to remove a Kitchen Tap Spout and How to change a Kitchen Tap O Ring Kit
Step 5: Reassemble Your Tap and Test for Leaks
Once you’ve replaced any damaged parts, carefully reassemble your tap. Turn the water supply back on and check if the leak is fixed. If the leak persists, you might need to consult a professional plumber.
When to Call a Professional
If your tap continues to leak after replacing the parts, there might be a deeper issue, like internal pipe damage. In such cases, it’s best to call a professional plumber.
Why Choose Genuine Replacement Parts?
Always opt for genuine replacement parts when fixing your kitchen tap. These parts are designed to fit perfectly and provide long-lasting performance, ensuring your tap functions like new.
Browse our shop for a variety of genuine replacement parts for your kitchen tap. You can always contact us here for help identifying the correct genuine replacement parts. Or you can search by model / brand here or by tap part here.
Final Thoughts
Fixing a dripping kitchen tap is a simple task when you have the right tools and instructions. By following these steps, you can solve the problem without hiring a plumber. Just remember to use genuine replacement parts for the best results.
For more detailed guides on specific repairs, like replacing kitchen tap valves, explore our DIY guides section.
Posted in: Helpful Tips
Leave a Comment (0) ↓